
Fast Relief: 12 Go-To Exercises for a Pinched Nerve in the Lower Back
If you have ever felt a sharp, burning jolt shoot down your leg when you move or bend, or a crackling electric sensation running from your buttock to your calf, you already know how disruptive a pinched nerve can be. That radiating pain can make simple tasks, reaching for a coffee mug, tying your shoes, or even sitting at your desk, feel like impossible feats. The good news is that gentle, targeted exercises may often be safer and more effective than lying in bed waiting for the pain to disappear on its own.
Most patients with low back pain or pinched nerves experience improvements in function and reductions in pain once appropriate treatment, stretching, or therapy is applied. Strong core and hip muscles can improve spinal control and reduce flare-ups for some people, especially when combined with smart activity changes.
This guide walks you through 12 specific exercises designed for a pinched nerve in the lower back. These movements require no special equipment, can be done at home or in the office, and are designed to help irritated nerves glide more freely, receive better blood flow, and gradually become less sensitive.
Before you start, a quick word on safety. Certain symptoms require urgent medical attention and should not be managed with home exercises alone. Stop and seek immediate medical care if you experience sudden loss of bladder or bowel control, rapidly worsening weakness in the leg, sudden difficulty walking, or symptoms that begin immediately after a serious fall or accident.
If you have mild to moderate symptoms, these exercises may help reduce nerve irritation and improve mobility. However, if pain worsens consistently or spreads further down the leg, or new numbness or weakness develops, stop the exercises and consult a healthcare professional.
Causes and Symptoms of a Pinched Nerve in the Lower Back
A pinched nerve may develop when the nerve in the lower back is compressed or irritated by surrounding tissues, such as muscles, bones, or discs. In many cases, the sciatic nerve is affected, leading to symptoms that can range from mild tingling to severe, radiating pain down the affected leg. You might also notice numbness, burning sensations, or even muscle weakness, depending on which nerve is involved and how much pressure it’s under.

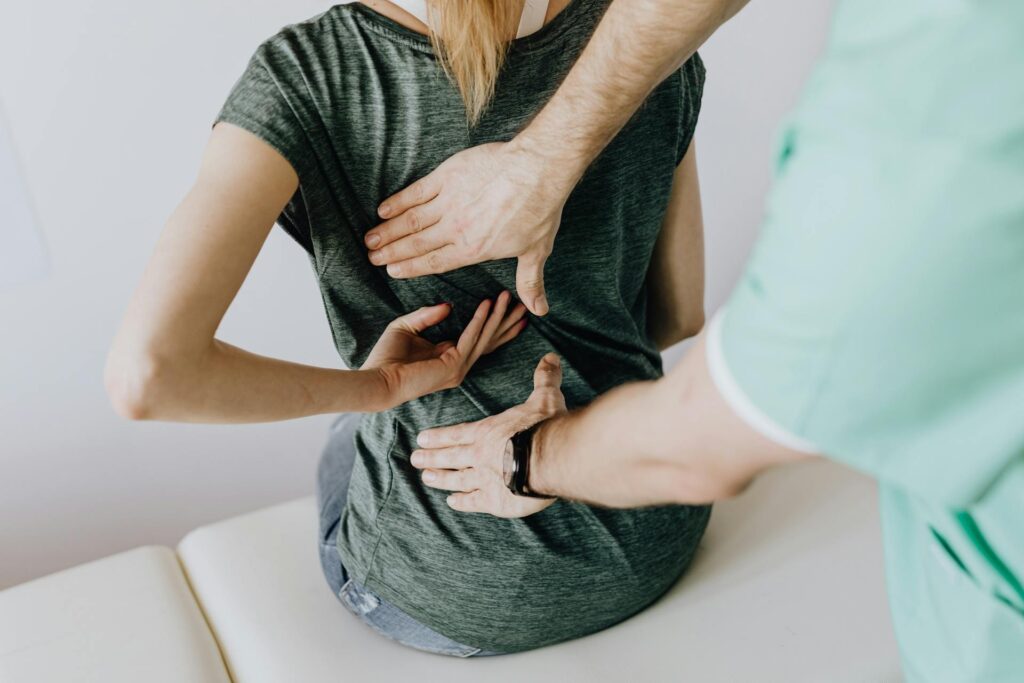
Common causes include herniated discs, where the soft center of a spinal disc pushes out and presses on a nerve root, as well as piriformis syndrome, where the piriformis muscle in the hip irritates the sciatic nerve. Spinal stenosis, or narrowing of the spinal canal, can also lead to nerve compression and pain. Because symptoms can mimic other conditions, it’s important to consult a healthcare professional or physical therapist for an accurate diagnosis and a treatment plan tailored to your needs. Early intervention may help alleviate pain, restore function, and improve mobility so you can get back to your daily activities with less discomfort.
12 Exercises for a Pinched Nerve in the Lower Back
These exercises are gentle, low-impact movements often recommended by physical therapists to reduce tension around lumbar nerve roots and ease sciatic nerve pain. You can do most of them at home or in the office. Start with one to two sets of eight to twelve repetitions once or twice per day, adjusting intensity to avoid sharp increases in leg pain.
1. Pelvic Tilt (Supine)
Lie on your back with your knees bent, feet flat on the floor about hip-width apart, and arms resting by your sides. Gently flatten your low back into the floor by rotating your pelvis backward, as if you are trying to tuck your tailbone between your knees.
Hold the flattened position for three to five seconds and then relax back to neutral. Repeat twelve to fifteen times. This movement may loosen stiff lumbar segments, lightly engage deep core muscles, and decrease pressure on irritated structures around the nerve. The motion should be small and pain-controlled. Pelvic tilts strengthen the core and stabilize the back by flattening the lower back against the floor.
2. Cat–Camel (Spinal Mobility on Hands and Knees)
Start on your hands and knees with your hands under your shoulders and your knees under your hips on a comfortable mat. Begin with your spine straight.
For the “cat” phase, slowly round your spine upward, tucking your tailbone and gently dropping your head. Feel your mid- and low-back open. For the “camel” (or cow pose) phase, gently let your belly drop toward the floor, lifting your chest and tailbone slightly without forcing a deep arch.
Complete eight to twelve slow cycles, focusing on smooth movement through each segment of the spine and relaxed breathing. A small increase in low back awareness is fine, but any strong increase in leg symptoms means you should reduce the range or stop. The cat-camel exercise can help relieve tension in the lower back and improve mobility.
3. Double Knees-to-Chest (Lumbar Flexion Stretch)
Lie on your back with both knees bent and feet flat on the floor. Bring one bent knee at a time toward your chest. Once both knees are up, gently pull them toward your chest until you feel a comfortable stretch in your low back and buttocks.
Hold for fifteen to twenty seconds, lower your legs back down, and repeat four to six times. This may open the spaces at the back of the lumbar spine and temporarily ease nerve irritation, especially after prolonged standing or walking. Gentle stretches like Knee-to-Chest, Cat-Cow, and Figure-Four/Piriformis stretches help decompress the spine.
4. Prone Lying and Prone on Elbows
Start by lying flat face down on a firm surface with a small towel under your forehead and your arms by your sides. Stay in this position for two to three minutes if tolerable.
Next, progress to prone on elbows: place your forearms under your shoulders and gently lift your chest while keeping your hips and pelvis in contact with the surface. Hold for thirty to sixty seconds, rest, and repeat three to five times.
Lumbar extension can reduce symptoms for some people, especially when symptoms centralize with extension based movements. Mild low back pressure or ache is expected, but escalating leg symptoms or new tingling into the foot means you should modify or discontinue the exercise.
5. Prone Press-Up (Lumbar Extension)
Begin lying prone with your hands placed under your shoulders, like the bottom of a push-up. Keep your legs relaxed and your hips heavy on the mat.
Gently straighten your elbows to raise your chest while keeping your pelvis and legs on the surface, allowing your low back to arch. Pause for one to two seconds at the top, then slowly lower. Start with eight to ten repetitions, staying within a tolerable, non-provocative range.
The goal is often centralization of symptoms, where leg pain retreats upward toward the buttock or low back over several days of regular practice. Stop if each repetition consistently makes leg pain travel farther down or if new numbness or weakness appears.
6. Supine Sciatic Nerve Glide
Lie on your back with one hip and knee bent to about ninety degrees. Use your hands to support the back of your thigh on the working leg.
Slowly straighten your knee until you feel a gentle pull in the back of your thigh or calf, then at the same time flex your ankle so your toes point toward your face. Return by bending your knee and pointing your toes away. Use your other leg as a reference point for stability.
This is a dynamic glide, not a long hold. Complete ten to fifteen smooth repetitions on the symptomatic side once or twice daily. A mild, brief zing or stretch is acceptable as long as it eases immediately when the raised leg is lowered. Pain that lingers or intensifies means you are using too much range. Nerve flossing helps the nerve glide smoothly through surrounding tissue, reducing tension and irritation. The seated nerve glide involves extending a leg straight while lifting the chin and bending the head toward the chest.
7. Bird-Dog (Core Stability)
Start on your hands and knees with your spine straight. Slowly extend your right arm forward and your opposite left leg straight back, keeping your hips level and your back flat.
Hold for three to five seconds, then return to the original position. Repeat with the left arm and right leg. Perform eight to twelve repetitions per side. This exercise improves core stability, which may reduce symptom flare-ups by improving trunk and hip control. Bird-Dog exercise improves core stability by extending opposite arm and leg while maintaining a flat back.
8. Knee-to-Opposite-Shoulder Stretch
Lie on your back with your knees bent and feet flat on the floor. Lift your right leg and gently pull your right knee toward your left shoulder until you feel a stretch in your buttock.
Hold for twenty to thirty seconds, then switch sides. Repeat two to three times per side. This stretch may help relieve pressure on the sciatic nerve by loosening tight muscles.
9. Child's Pose Stretch
Start on your hands and knees with your arms forward and knees bent. Sit back onto your heels and lower your chest toward the floor, stretching your lower back.
Hold for twenty to thirty seconds, then return to the starting position. Repeat two to three times. This gentle stretch may help decompress the spine and relieve tight muscles. Child’s Pose is performed from hands and knees by sitting back on heels and lowering the chest toward the floor.
10. Seated Figure-Four Stretch
Sit in a seated position with your feet flat on the floor. Cross your right ankle over your left knee, forming a figure four with your legs.
Gently lean forward with a straight spine, keeping your back straight, until you feel a stretch in your right hip and buttock. Hold for twenty to thirty seconds, then switch sides. Repeat two to three times per side. This stretch targets the piriformis muscle, which may relieve pressure on the sciatic nerve. The figure-four stretch can help open the hips and relieve pressure on the sciatic nerve.
11. Glute Bridge
Lie on your back with knees bent and feet flat on the floor, hip-width apart. Press through your heels to lift your hips toward the ceiling, squeezing your glutes at the top.
Hold for three to five seconds, then slowly lower. Perform ten to fifteen repetitions. This exercise strengthens the glute muscles, which support the lower back and may reduce nerve compression.
12. Hip Flexor Stretch
Kneel on your right knee with your left foot in front, knee bent at ninety degrees. Gently push your hips forward while keeping your spine straight until you feel a stretch in the front of your right hip.
Hold for twenty to thirty seconds, then switch sides. Repeat two to three times per side. This stretch may help relieve tight muscles that contribute to lower back nerve irritation.
How to Know If These Exercises Are Helping
The concept of “centralization” is your best friend here. If your leg pain moves closer to the spine, even if your back feels more noticeable temporarily, that is usually a positive sign. It suggests the nerve is becoming less irritated at its origin.

Try a simple three-to-five-day self-check. Track your pain location, intensity on a zero-to-ten scale, and which activities worsen or improve symptoms before and after starting the routine.
Improvements to look for include:
Sign of Progress | What It Means |
|---|---|
Better sleep | Less nerve irritation at night |
Less morning stiffness | Improved mobility and blood flow |
Easier sitting/standing transitions | Core and spinal stability improving |
Fewer or shorter pain flare-ups | Nerve sensitivity decreasing |
Pain moving out of leg | Centralization occurring |
If symptoms are unchanged after two to three weeks of consistent, comfortable practice, or if they worsen, it is time to see a physical therapist or spine-informed provider. Needing additional help does not mean you did anything wrong. Some pinched nerves require more tailored assessment and hands-on care. Physical therapy complements other treatments by offering tailored exercises to relieve nerve compression and strengthen surrounding muscles.
Who Should Not Do These Exercises
Avoid these exercises if you have:
- Sudden loss of bladder or bowel control.
- Severe or rapidly worsening leg weakness.
- New numbness or tingling in the groin area.
- Symptoms following a serious injury or fall.
- Pain that significantly worsens with movement or exercise.
In these cases, seek urgent medical evaluation.
Exercise Plan Development and Professional Support
Creating an effective exercise plan for pinched nerve pain starts with gentle movements targeting the nerve and surrounding muscles. A physical therapist can design a personalized routine that includes stretching, nerve glides, and strengthening exercises tailored to your specific symptoms and goals.
Regular practice of these gentle exercises may help reduce nerve pain, prevent stiffness, and support long-term recovery. Working closely with a healthcare professional ensures your exercise plan is safe and effective.
At-Home Remedies for Pinched Nerve in Lower Back
In addition to exercises, several at-home remedies can help alleviate pinched nerve pain:
- Ice therapy can help reduce inflammation in the first 48 hours after experiencing a pinched nerve.
- Heat therapy can soothe tight muscles after the initial inflammation has decreased.
- Sleeping on your side with a pillow between your knees can relieve pressure on your spine.
- Low-impact walking can support circulation, keep you from stiffening up, and help you stay confident with movement.
- Walking can help relieve stress on a pinched nerve by gently stretching it through its range of motion.
Many people feel better with gentle movement that reduces stiffness and sensitivity.
Professional Treatments for Pinched Nerve in Lower Back
If symptoms persist or worsen, professional treatments may be necessary:
- Physical therapy is the primary escalation option, offering tailored exercises to relieve nerve compression and strengthen surrounding muscles.
- Chiropractic care may help some people with short-term pain and mobility, but it is not appropriate for everyone. Avoid high-velocity techniques if you have red flags or significant neurologic deficits.
- Shockwave therapy and mechanical traction / commercial ‘spinal decompression may be considered in specific cases but are not standard first-line treatments for lumbar radiculopathy.
- Massage therapy can help relax muscles, improve blood flow, and reduce tension around the affected area.
Shared decision-making and screening for red flags are essential when considering these options.
Bottomline
Many patients with pinched nerves in the lower back improve mobility and reduce pain without surgery when movement is restored early, exercises are progressed thoughtfully, and flare-ups are managed rather than feared. These twelve exercises are a starting point to alleviate pain, increase blood circulation to healing tissues, and relieve pressure on irritated nerves. If you hit a plateau or symptoms persist, professional guidance can help and get you back to what you love doing without that constant reminder shooting down your leg.